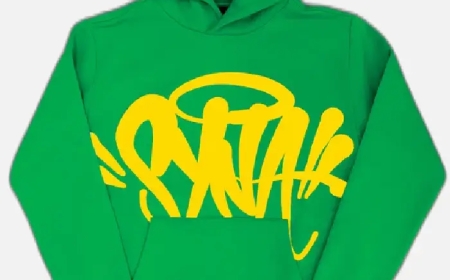


Professional Tips to Digitize Logo for Embroidery That Pops

You've seen those stunning embroidered logos that seem to jump off the fabriccrisp edges, perfect texture, and colors that sing. What separates these showstoppers from flat, amateurish attempts? It all comes down to professional digitizing techniques that most hobbyists never learn. Whether you're branding company polos or creating custom merch, these insider secrets will digitize your logo for embroidery from "meh" to magnificent.
Start with Artwork That Actually Works
Most logo embroidery fails before digitizing even begins. The problem? Using artwork designed for print, not stitches. Professional digitizers know to:
- Simplify aggressively: Remove gradients, drop shadows, and any element smaller than 1mm
- Bolden text: Minimum 1/4" height for readability (1/8" if using satin stitch)
- Limit colors: 4-6 thread colors maxmore creates muddiness
- Convert to vectors: Always start with .AI or .EPS files for clean edges
Pro tip: Create two versions of your logoone for print and a simplified "embroidery edition" with thicker lines and reduced detail.
The Density Sweet Spot
Nothing screams amateur like puckered fabric or gap-filled designs. Professional digitizers live by these density rules:
- Fill stitches: 0.35mm spacing for most fabrics (go to 0.4mm for thick materials like denim)
- Satin stitches: 3.5-4.5mm widthnarrower risks thread breaks
- Underlay: 1.5-2mm spacing for stability without bulk
Test on actual fabric firstwhat looks good on screen may stitch too dense or sparse.
Stitch Direction That Makes Designs Pop
The secret to dimensional-looking embroidery? Strategic stitch angles:
- Radial stitchingfor circular elements (like spokes on a wheel)
- 45-degree anglesfor most satin stitches (avoids the "venetian blind" effect)
- Contrasting directionsbetween adjacent elements to create visual separation
Example: For a circular logo with text, stitch the circle radially and the text at a 45-degree anglethe contrast makes both elements stand out.
Underlay: Your Invisible Foundation
Skipping proper underlay is like building a house without a foundation. Pros use:
- Edge run: Outlines all elements first to prevent shifting
- Zigzag: Perfect under satin stitches on stretchy fabrics
- Tatami mesh: Under large fill areas for ultra-smooth results
Pro trick: Use lighter underlay thread when working with sheer fabrics to prevent show-through.
Small Text That Actually Stays Readable
Those tiny letters on your logo? Here's how professionals keep them crisp:
- Satin stitch onlyfor text under 1/4"
- Increase letter spacingby 10-15%
- Bold fontsstitch cleaner than thin ones
- Avoid serifsunless they're chunky
When in doubt, stitch a test at actual sizeif you can't read it without squinting, neither can anyone else.
Color Transition Tricks
Prevent color bleed and keep edges sharp with:
- Running stitch bordersbetween color blocks
- Stitch dark colors first(less visible if they peek through)
- Leave 0.5mm gapbetween contrasting colors
For logos with gradients, convert to 2-3 color blocks with clear separationembroidery can't replicate subtle blends.
Testing Like a Pro
Amateurs stitch and hope. Professionals test systematically:
- Digital simulation: Check for long jumps or density issues
- Scrap fabric test: Use the exact material you'll stitch on
- Color verification: View under different lighting
- Wash test: Ensure durability (especially important for merch)
Keep a "swatch library" of tested designs on different fabricsit'll save countless hours.
When to Call in the Pros
Even experts outsource when:
- Logo has intricate details(fine lines, tiny text)
- Specialty techniquesneeded (3D puff, metallic thread)
- Branding consistencyis critical
- Time is money(professional digitizing often pays for itself)
Top services like Digitizing Buddy can turn around pro-quality files in 12 hours when you're in a crunch.
The Future of Logo Digitizing
Stay ahead with these emerging techniques:
- AI-assisted density adjustmentthat adapts to fabric type
- Dynamic pull compensationbased on stitch direction
- Augmented reality previewsshowing exactly how stitches will lay
But remembertechnology assists, it doesn't replace skilled digitizing judgment.
Your Action Plan
- Simplify your logofor embroidery success
- Master density and underlaythe foundation of pro work
- Test relentlesslybefore final stitching
- Build a reference libraryof what works
Great logo embroidery doesn't happen by accident. It's the result of intentional digitizing choices that account for thread, fabric, and machine behavior. Implement these professional techniques, and your designs will go from flat to phenomenalthe kind that makes people stop and ask, "Who did your embroidery?"
Now grab your best logo file and start digitizing like the pros do. That perfect stitch is closer than you think.